Metrology
TIVE 600 unit, supported by ARGUS 600 and K600 or Z600 camera, allows for storing JPEG images on USB drive, they can be exported, or used for 3D comparison function for measurement processes dedicated for ednoscope testing.

3D stereoscopic lenght measurements
- Connection of ARGUS 600 probe with diameters 4, 5 or 6 mm and side or frontal measurement head to TIVE 600 allows for mesurement of defects in most observed planes also from long distance

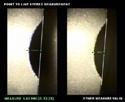
„POINT – LINE” 3D stereo measurements
- Connection of ARGUS 600 probe with diameters 4,5 or 6 mm and side or frontal measurement head to TIVE 600 allows for measurement of depth of removed material in most observed planes also from long distance.

3D SURFACE MEASUREMENT
- Connection of ARGUS 600 probe with diameters 4,5 or 6 mm and side or frontal measurement head to TIVE 600 allows for check and evaluate the surface of defect in most observed planes also from long distance.

3D MEASUREMENTS OF FAULT DEPTH
- Connection of ARGUS 600 probe with diameters 4,5 or 6 mm and side or frontal measurement head to TIVE 600 allows for depth measurement of the faults in most observed planes also from long distance.

COMPARATIVE MEASUREMENTS
- Connection of ARGUS 600 probe with diameters 4,5 or 6 mm and side or frontal measurement head to TIVE 600 allows to evaluate the size of the defect by comparison with object on the photo with known size or with the image of the pattern.

TESTING BLOCKS BTS 40 – BTS 50 – BTS 60
- Testing blocks allow for verification of the appropriate functioning of 3D stereo measurements done by EFER. The report is delivered with the block, enabling identification in regard to ISO 9001:2000.


